
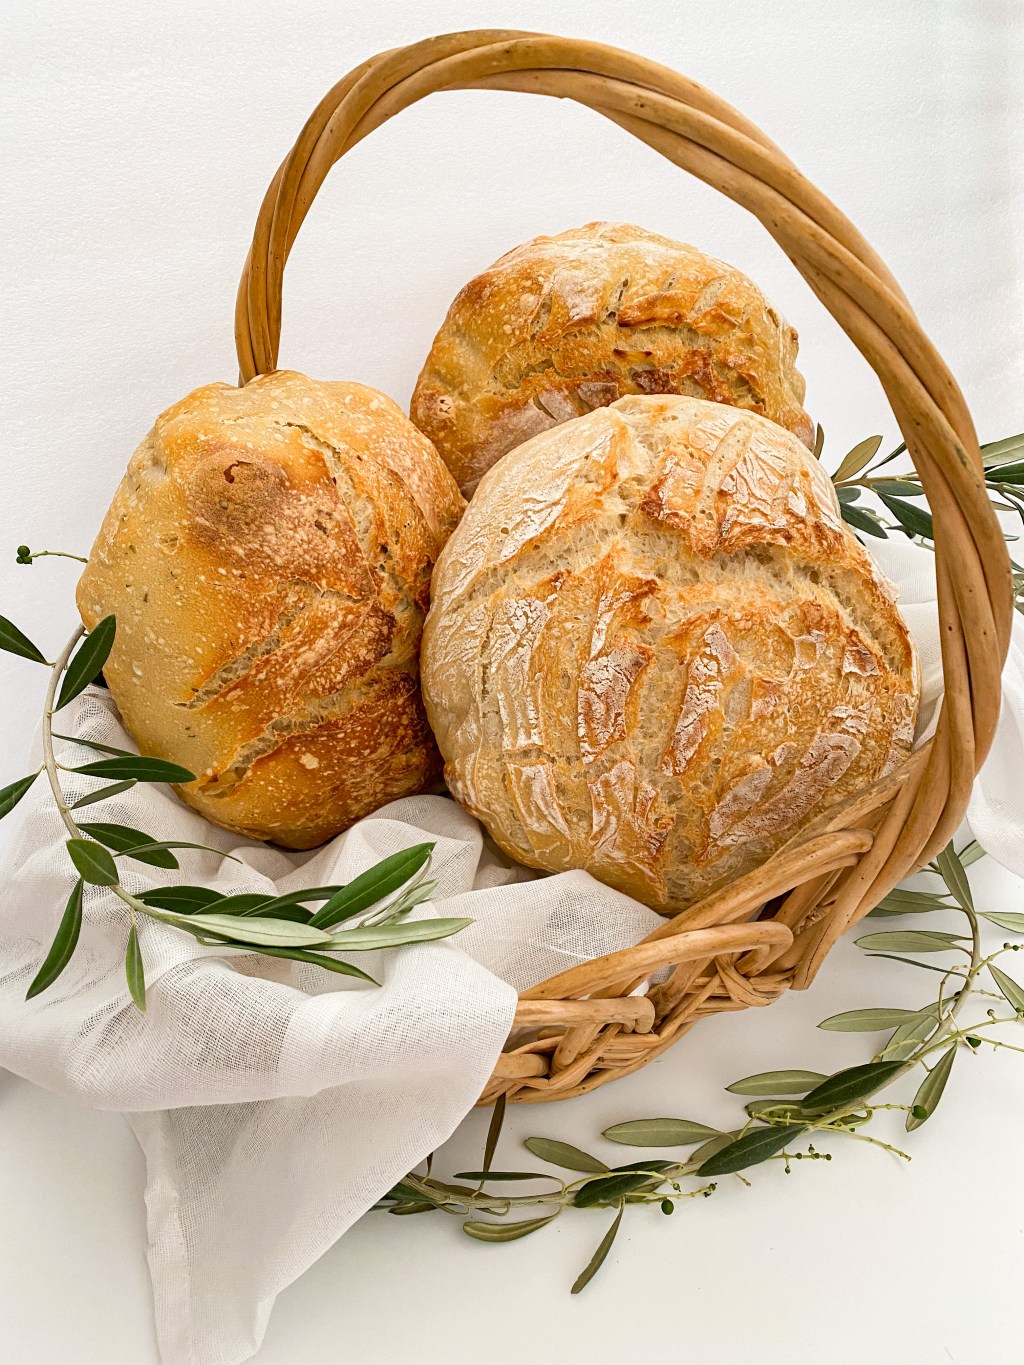

This is the type of recipe you walk into a home with a delightful aroma that makes you want to savor the smell, as well as the taste. I mean who doesn’t love sourdough bread, but in all reality there is no way you could resist this garlic and rosemary sourdough bread.
Sourdough can be intimidating to make, and may take some practice, but boy is it worth it! I am so thankful that my good friend Trishy spent several days helping me in my trial runs correcting what I needed to do, in order to finally get it down. It is so rewarding, and this recipe will now be the staple piece of all of your dinner parties!
- Shopping List:
- Kitchen Scale
- Bread Flour
- Room Temperature Filtered Water (Or bottled water)
- Salt
- Garlic Cloves
- Olive Oil
- Fresh Rosemary
- 50g of starter (g=grams) (see recipe below)
HOW TO MAKE A SOURDOUGH STARTER
- Prep time: 5 min. a day for 5 days
- Yield: 1 starter
What you will need for the starter
- Glass jar with lid
- Kitchen scale
- whole wheat flour
- All-purpose flour
- Room temperature filtered water (or bottled water)
INSTRUCTIONS
1. Day 1: use a kitchen scale and add 25g of whole wheat flour, 25g of all-purpose flour, and 50g of water. Stir to combine. The mixture should look like a thick paste. Cover the jar with a lid or use plastic wrap and place in a warm location for 24 hours. The temperature of your room can have a big effect on the speed at which your starter grows. Ideally, you want it to be between 68 and 72 degrees. The starter will not flourish in cooler temperatures.
2. Day 2: you may or may not see a few bubbles starting to appear in the starter. Either way, discard about half of the starter and add the same ingredients to the jar: 25g whole wheat flour, 25g all-purpose flour and 50g of water. Stir to combine. Cover the jar and place in a warm location for 24 hours.
3. Day 3: you will likely see a few more bubbles today. The starter should start to smell a little bit sour (in a good way!). Again, discard half of the starter. Today you’ll switch to using only all-purpose flour. Add 50g of all-purpose flour and 50g of water. Stir to combine. Cover the jar and place in a warm location for 24 hours.
4. Day 4: You should see a lot more bubbles and the starter should increase in volume. Repeat the process of Day 3.
5. Day 5: the starter will be very bubbly and double in volume. It will have a funky sour smell that indicates this starter is ready to use!
6. Remember you have to keep feeding your starter to keep it alive. Feed your starter every 7 days. 50g of starter, 100g all-purpose flour and 100g of room temperature filtered water. Stir to combine and store in your fridge. Discard the remaining starter.
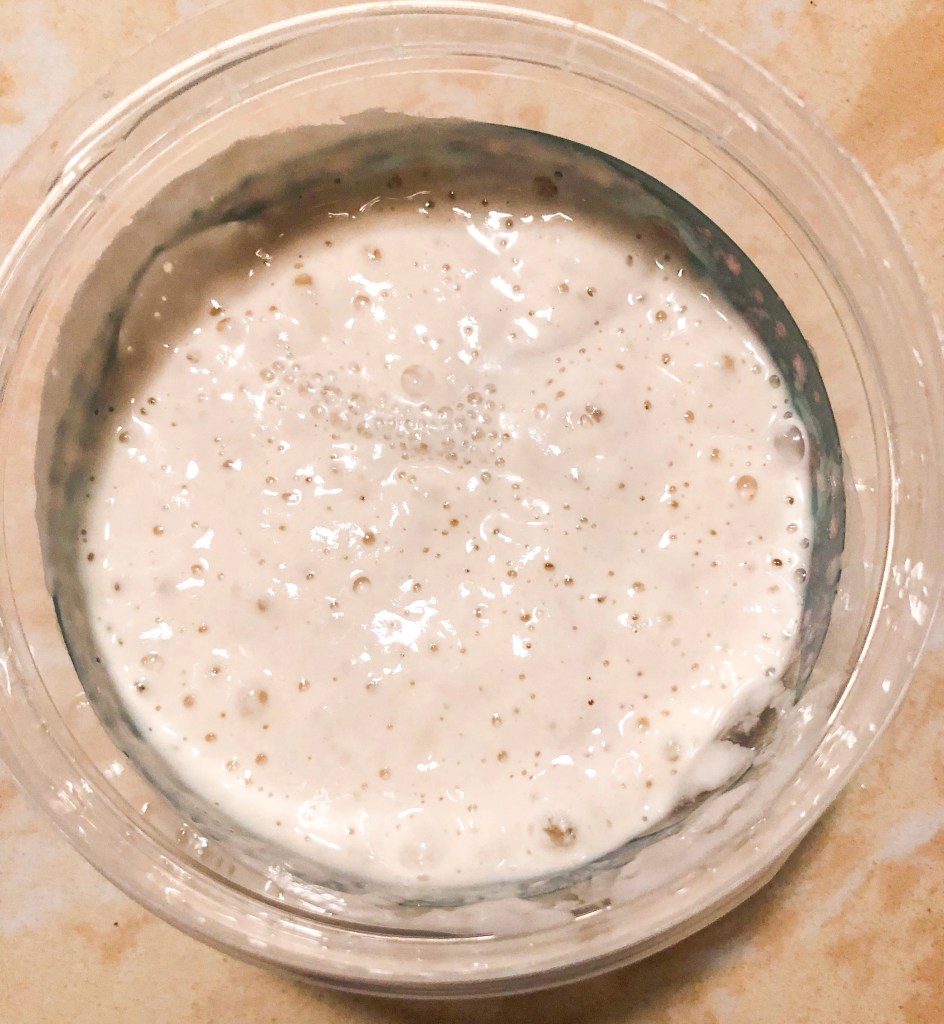
Sourdough Starter on day five.

Garlic & Rosemary Sourdough Bread
- Prep Time: 15 to 20 hours (Depending on how long it takes your dough to rise)
- Bake Time: 40 Min.
- 1 Loaf
1. Feed your starter with 100g of flour, 100g water and 50g of starter and let it rise for 5-8 hours on your counter. (Overnight) About an hour before it is ripe, start on step two. (You can test your starter by taking a tiny bit of your starter and putting in a small bowl of water. If it floats your starter is ready).
2. In a larger glass bowl mix together 500g of bread flour and 325g of water. Cover with plastic wrap and let it autolyse for 1 hour minimum.
3. Add 100g ripe starter to autolyse flour water mixture. Dimple it in and mix to combine fully. Cover with plastic wrap. Let that sit for 15 minutes minimum. Feed any unused starter then save in the fridge for next time. Don’t forget to feed it about once a week!
4. Add 10g salt, 25g water, 4-5 roasted garlic cloves with olive oil drizzled (sliced) and 3 teaspoons of fresh rosemary (cut to small pieces) to dough. Dimple in and mix to combine fully. Make sure to get all the water incorporated. May feel like it’s separating a little. That’s okay. Cover and let sit for 30 minutes minimum.
5. Wet your hands and start the first set of stretch and folds. Pull (stretch) and fold the dough inward from the top, left, bottom and right. Cover and repeat 3 more times about 30 minutes apart. Add an extra stretch and fold if your dough is a little wet after the 4th one. Cover after each stretch and fold.
6. Let covered dough rise for 2-5 hours on the countertop in a warm place or turn the oven on 175 degrees turn off when it reaches temperature and place dough in the oven and let it rise. (Cover bowl with towel).
7. Flour a clean dry countertop or cutting board. Dump dough from the bowl slowly to protect rise. Use a bread scraper to help get it out.
8. Rough shape the dough by pulling it inward 6 or 8 times. Similar to stretch and fold. Use a dough scraper to flip dough. Cover with a towel for 20-30 minutes. In the meantime prepare your proofing bowl or glass bowl with a towel that is lightly floured.
9. Shape dough by pulling inward at the north, south, east and west. Flip onto an un-floured surface. Make tension in the ball by tucking the bottom in all around as best as you can. Use a dough scraper or fingers to pull tight. Use a scraper to flip dough back into the proofing basket. Cover with a towel and refrigerate overnight.
10. Cut a round piece of parchment paper for the bottom of the Dutch oven. Place the Dutch oven with lid in a preheated oven at 475 degrees. Leave it for 30 minutes.
11. Pull dough from the fridge. Slowly dump onto a piece of parchment paper. Cut the paper about 2 inches outside of the loaf. Score the dough with a sharp knife to release the steam while it bakes.
12. Pull Dutch oven from the preheated oven and drop the parchment lined dough into it. Cover and bake for 40 minutes. Place a cookie sheet under the Dutch oven to help with the bottom of the bread.
13. Take out of the oven and place the loaf on a cooling rack.
When cool it’s ready to slice to use as toast, or use for a sandwich, and so much more! Most importantly ready to share and enjoy, if you make it tag us at #SSM or #SimplySouthernMama


Our dear family friend Trishy. We are so thankful for the memories made with you, and the many hours spent in the kitchen learning the craft of sourdough bread making.

Leave a comment